
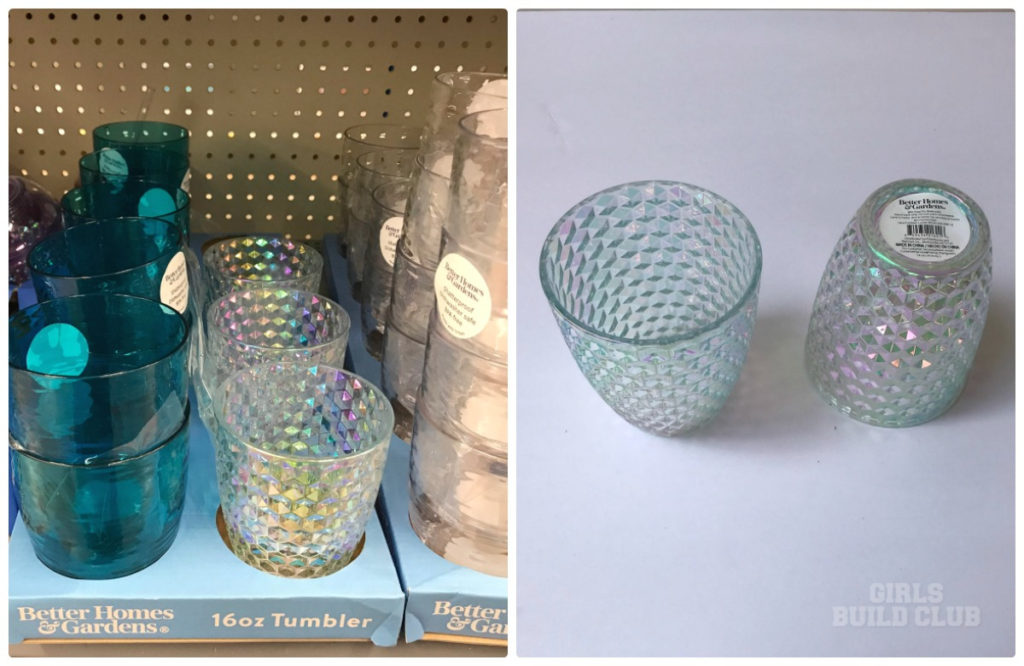
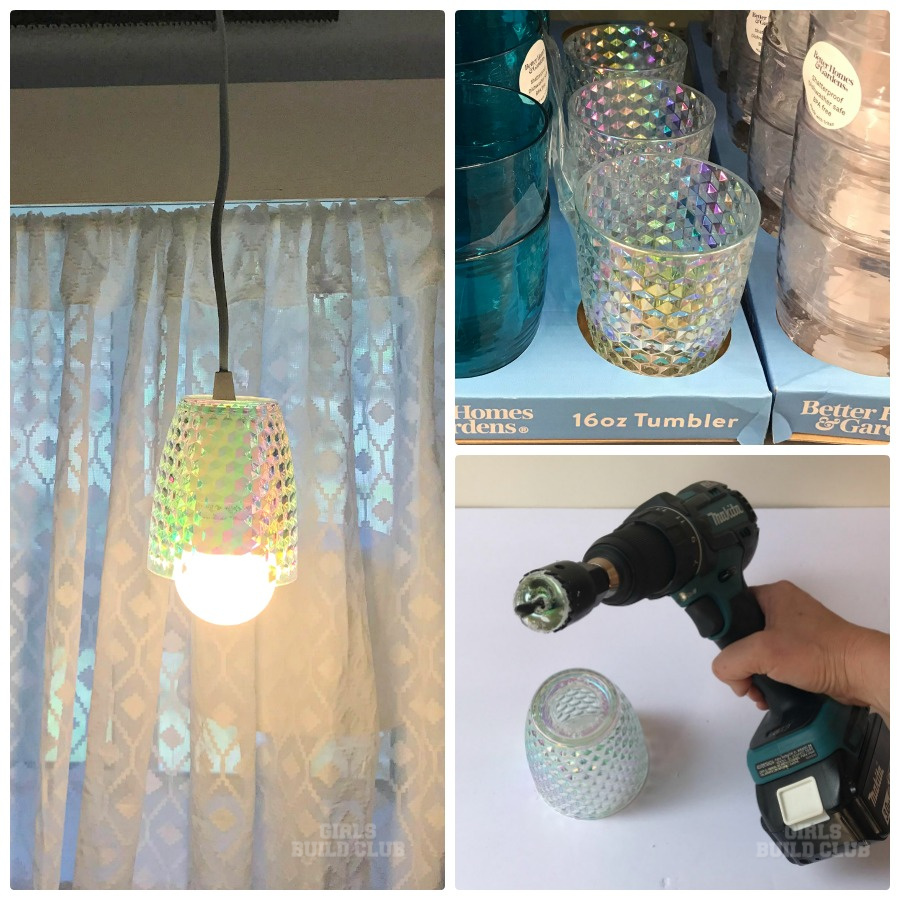
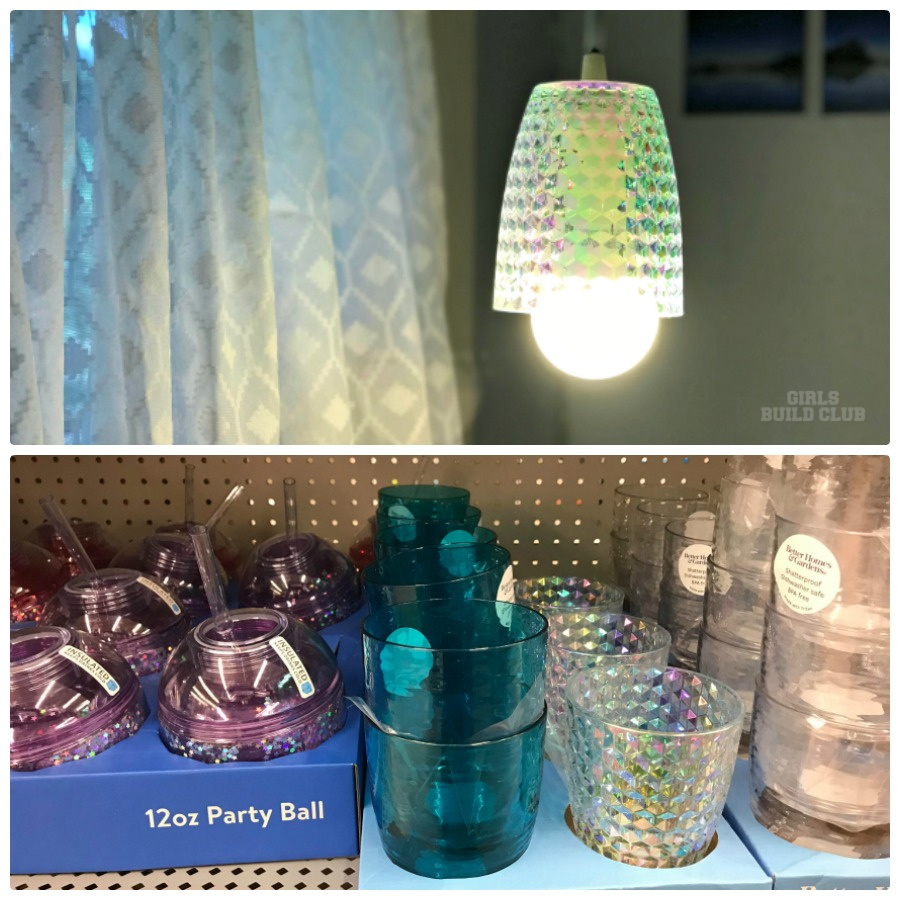
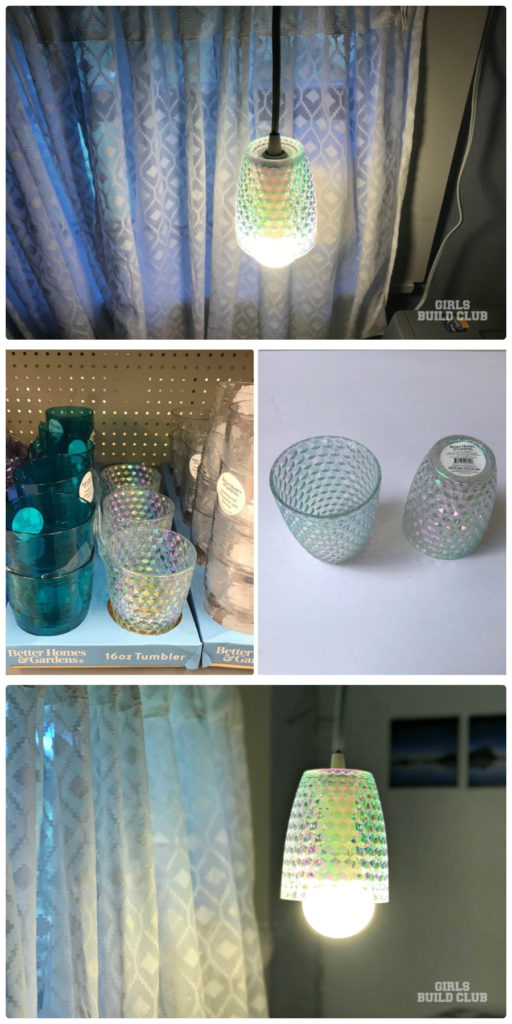
A couple weeks ago I found these awesome iridescent tumbler cups at Walmart. I don’t know what their regular price was, but I got them on clearance for $0.50 a piece! But the truth is, we don’t need more cups in our cupboards. So I started thinking…What can I do with these pretty things? And a Walmart cup pendant light is what it became.
I’m going to show you step by step how I turned these Walmart cups into a pendant light.
I’ll show you the exact cord kit I bought on Amazon in the supply list below.
And then I’ll show you how I put a hole in the bottom of the cup to string a cord through it. 🙂
Ready?
Here’s what you’ll need:
Supplies
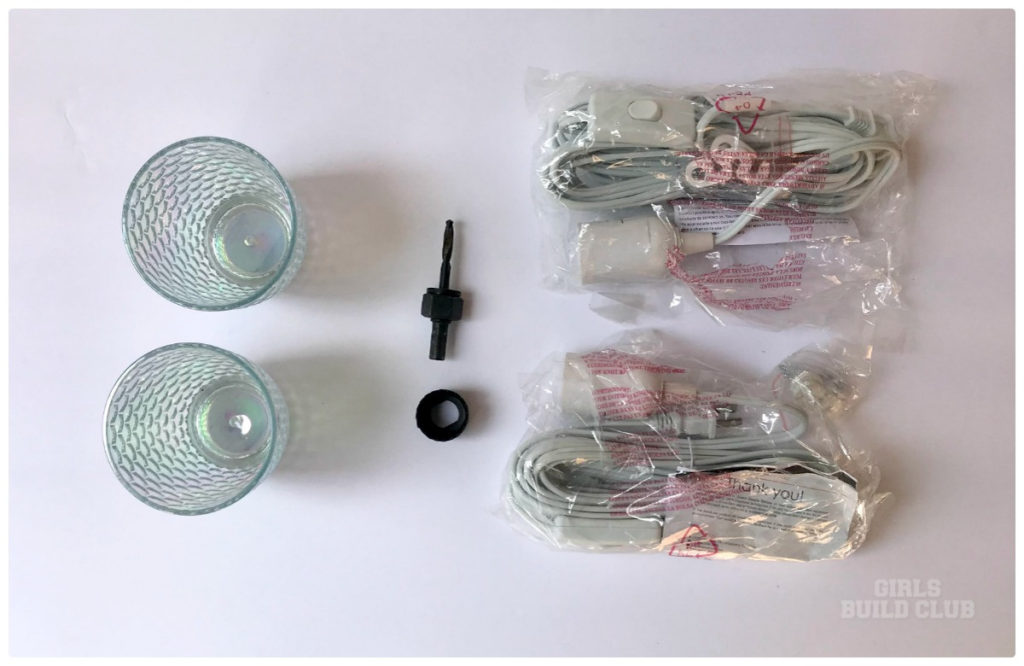
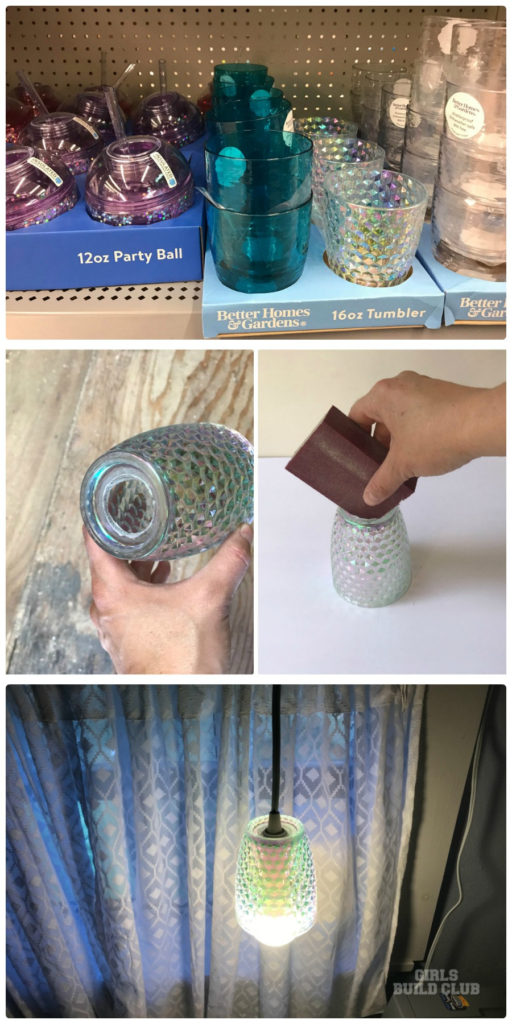
- Cups / Tumblers of your choice. Mine are plastic.
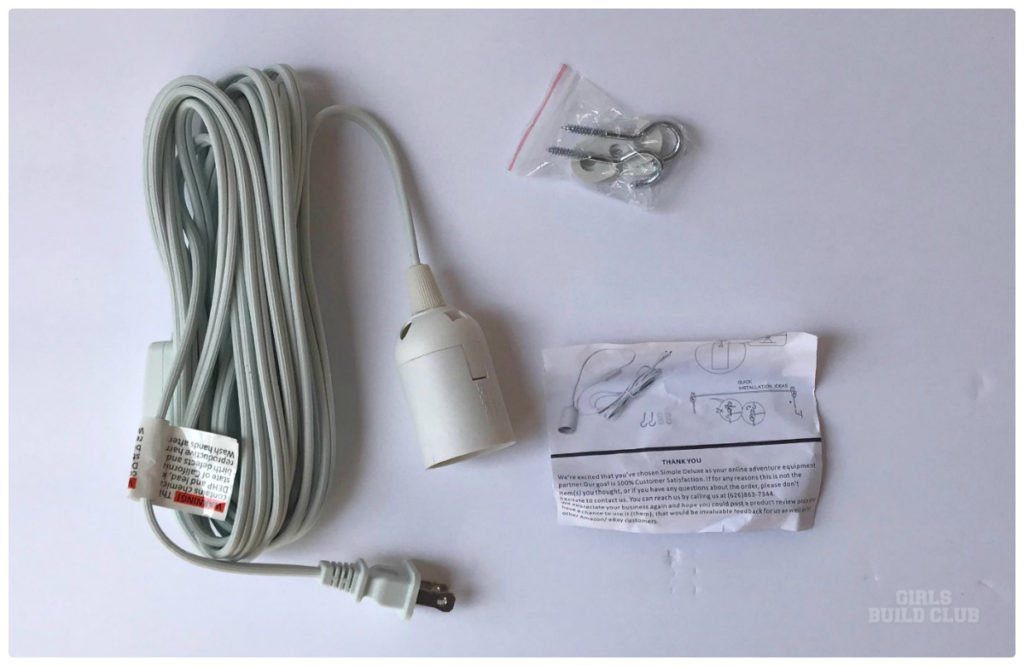
- Pendant light cord kit with toggle switch. <<Click to see the exact kit on Amazon. BTW, that’s my affiliate link.
- Drill
- Drill bit
- Hole saw and arbor
- Sand paper
Before You Buy the Hole Saw
You’ll want to determine the size of hole you need first. The hole needs to be big enough to slide the cord through, as well as the toggle switch.
BUT, you don’t want the bulb socket to come through, too. You want the hole to be smaller than the bulb socket.
If you’re buying your hole saw from a hardware store, just take your pendant cord set with you and hold it up to the hole saw to make sure it will work before you buy it.
Instructions
I chose a drill bit that is about the same size as the hole saw arbor. Before using the hole saw I drilled a small hole. The hole saw drill I was using wasn’t very sharp and I knew it would have a hard time staying in one place. It would probably skate all over the surface of the tumbler and make it hard to use.
1. Drill a small hole first.
Hold the cup with your free hand, and don’t jab your hand with the sharp bit. 🙂
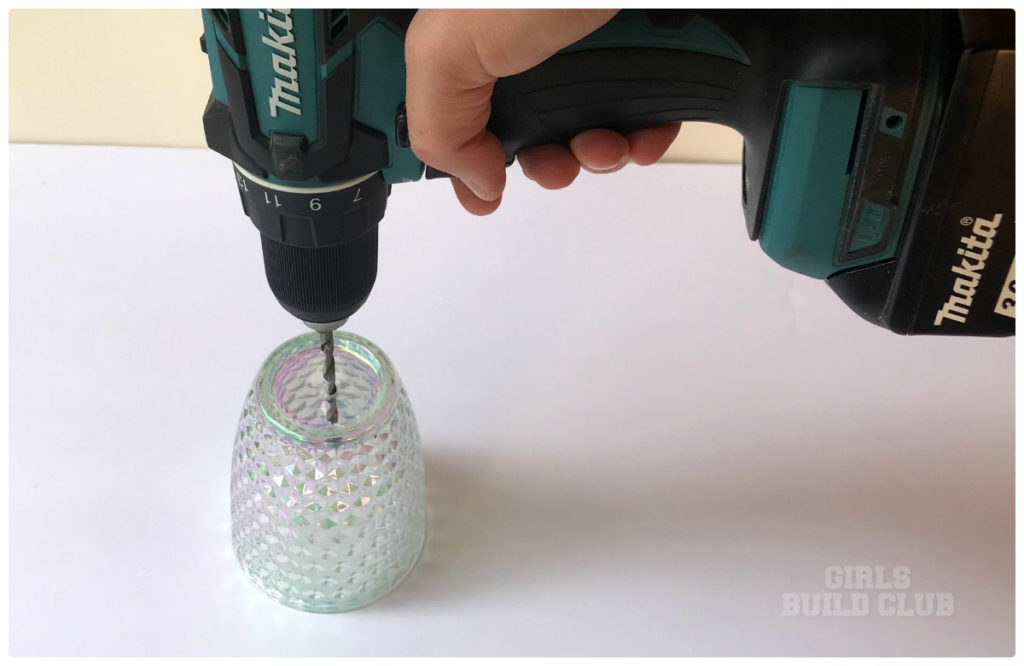
2. Then use the hole saw to cut the hole in the bottom of the cup.
Now attach the hole saw to the arbor, put the arbor in the drill. Holding the cup firmly on a surface that won’t scratch the rim, cut the hole in the cup.
If you’re not familiar with a hole saw, just read the instructions that come with it and the arbor and you’ll do just fine.
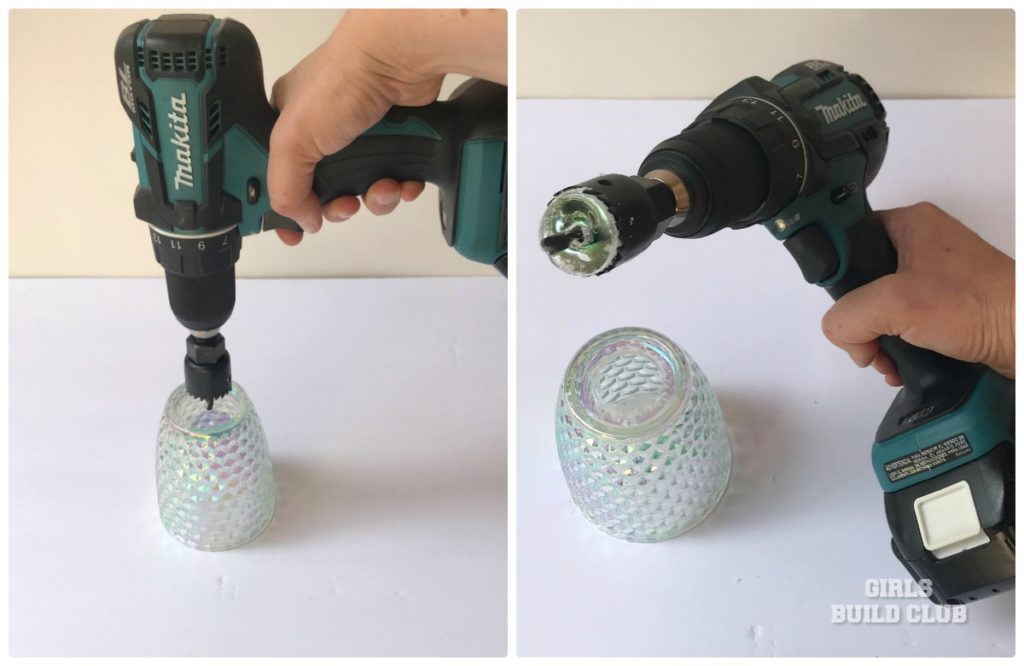
Keep in mind, when you’re cutting the hole, the friction will start to melt the plastic of the cup. I stopped to see if the hole saw was cutting through the plastic. It was and it did get gooey for a moment, but it hardens fast. I started the hole saw again and kept with it until it cut all the way through the cup.
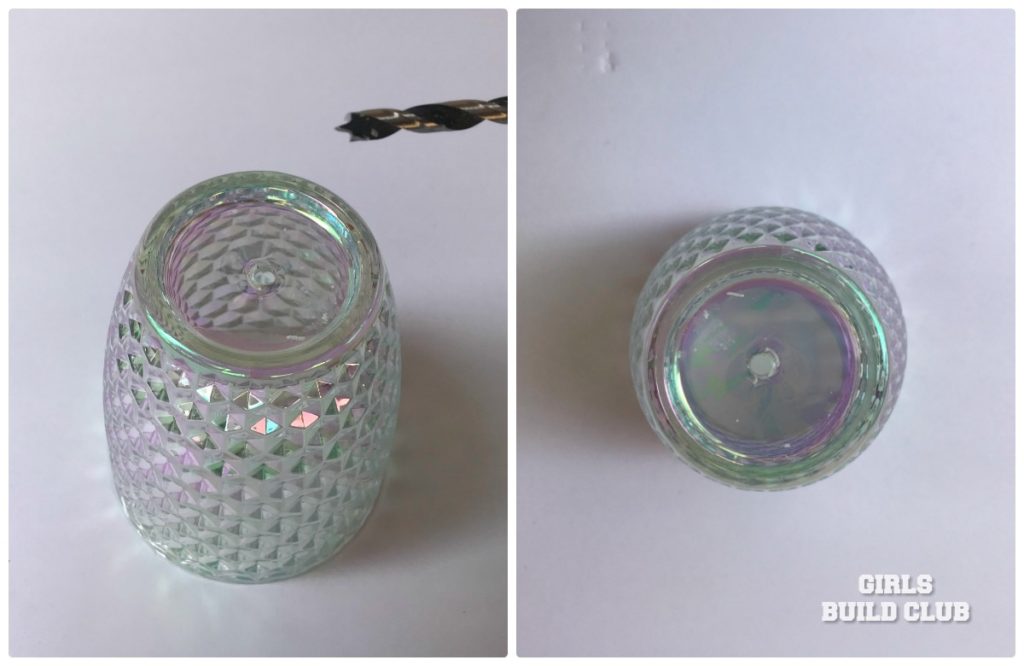
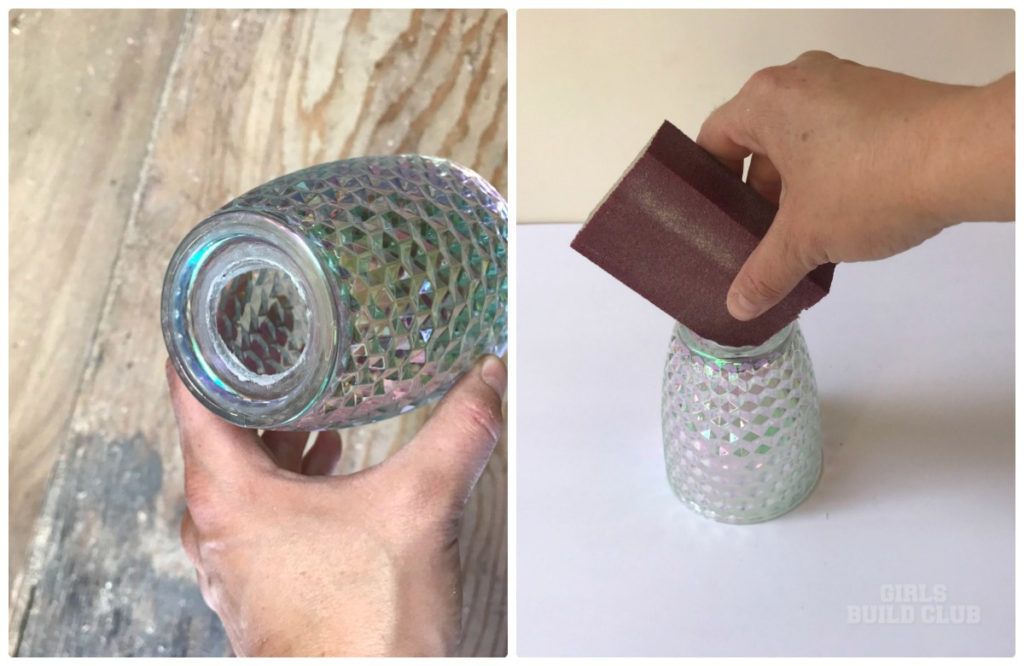
3. Sand down the edges of the jagged hole.
And pop off the blobs of hardened melted plastic.
Don’t worry if this hole isn’t very pretty. No one will see it when it’s hanging up above your head as a light.
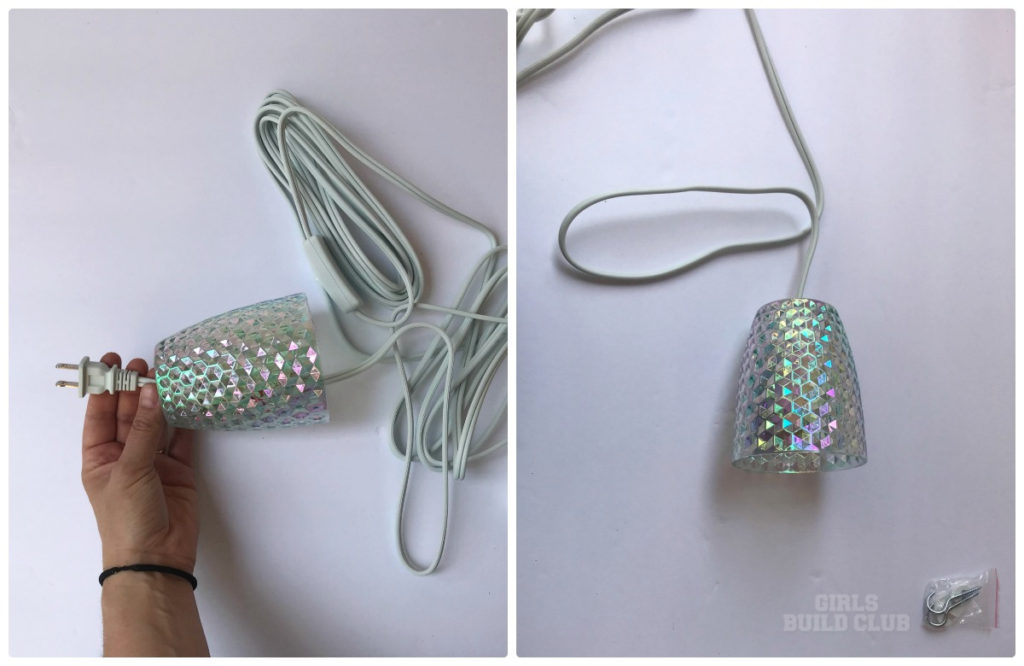
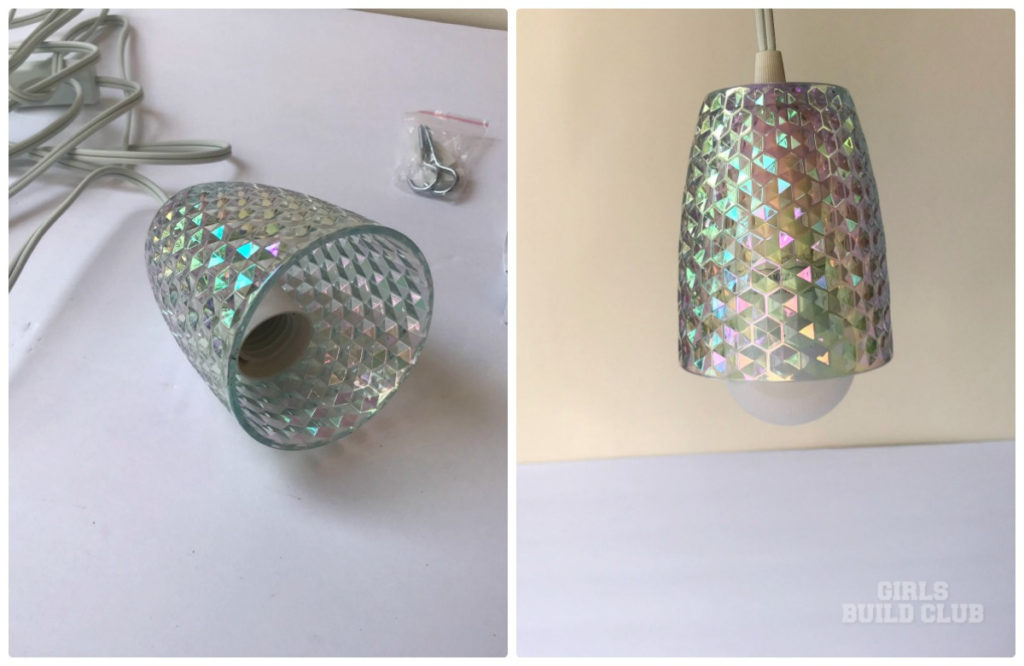
4. Pull the cord through the hole in the cup.
If you cut the right size hole, the cord will go through until the light bulb socket hits the cup bottom.
5. Screw a bulb into the socket that is safe to be used in this situation.
You don’t want to cause a fire hazard! So do your due diligence and choose your bulb wisely.
6. Screw a hook into ceiling to hang the cord.
And set how low the pendant light hangs with the plastic tab.

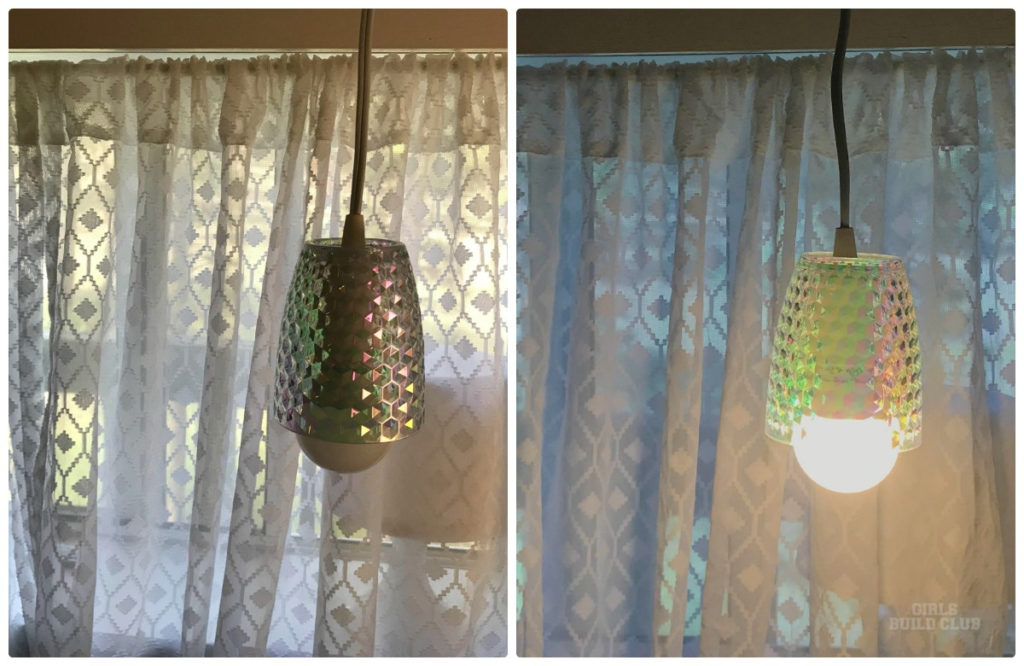
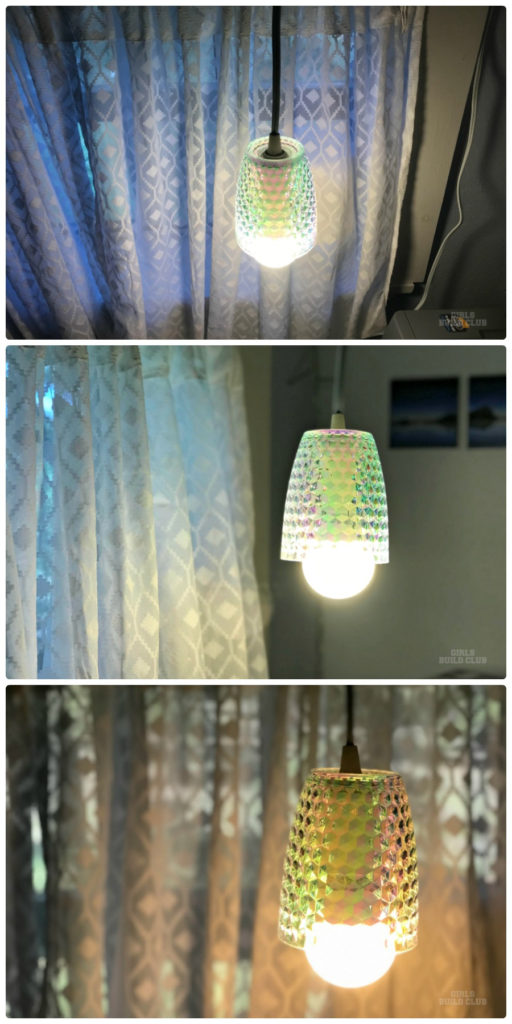
6. There it is! A fully functioning Walmart cup pendant light! Haha!
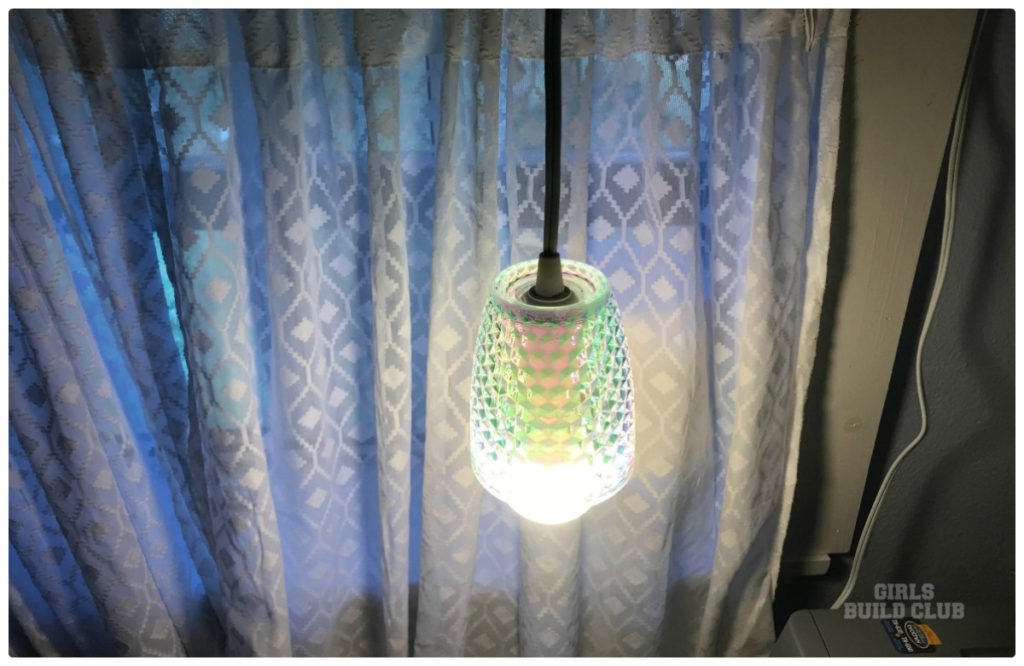
I don’t think anyone would know it’s made from a Walmart cup unless they were told. What do you think?
I love how the iridescence throws different colors on the white drapes. It’s really subtle, but I can see it’s there.
If you love unique, cheap and easy DIY projects, then I think you’ll like the Girls Build Club newsletter. It keeps you up to date on other projects like this!
You can sign up below.
Leave a comment below if you have any questions. I’d love to hear from you.
Thanks for stopping by!
~Liesell @GirlsBuildClub.com
Where did you get the plastic tab to wind the cord on for the hanging light?
Hi Jo Bray! The plastic tab came with the pendant cord kit that I bought on Amazon. I’ve linked it in the supplies list. I’m very happy with it, as it was a two pack lamp kit with ceiling hooks and tabs for height adjustment. It was only $14.99 for the two pack! Thanks for your question. Hope that helps!
~Liesell
I could use a supply of those tabs. Did they have a specific name in the package. I can make my own hanging lamps but those tabs would really come in handy. Thank you
I’m sorry, forgot to say that it’s a really cute idea
Thank you, Elena! Appreciate it. 🙂
Beautiful and classy looking.great idea.
Elena, the pendant cord kit is by Simple Deluxe. You can find it here: https://www.amazon.com/gp/product/B06XD1CBGV/ref=ppx_yo_dt_b_asin_title_o01_s00?ie=UTF8&psc=1 Hope that helps!
Loved it
Thank you, Joan! Thanks for stopping by the blog.
Really love this! I am headed to Walmart to look for those cups. THANK YOU FOR SHARING THIS WITH US!👍💛😊💕💙💜